Square Foot Gardening Method
Article by Lorraine Dick,
Hanneke's Place Community Garden
Square Foot Gardening is a type of
intensive gardening popularized by Mel Bartholemew.
It is based on the idea
that the wide rows in conventional home gardening are a waste of time, work,
water and space, and that more quality vegetables can be grown in less space
with less effort, no chemical additives, and on any type of ground, since the
underlying soil is not used in the garden.
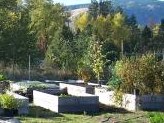
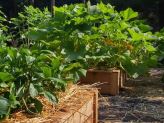
In this method, the garden space is divided into beds that are easily accessed from every side.
A 4' x 4', 16 sq ft or 120cm x 120cm, 1.4m² garden is recommended for the first garden.
A path wide enough to comfortably work from should be made on each side of the bed, if possible, or if the bed must be accessed by reaching across it, a narrower one should be used so that no discomfort results from tending the garden.
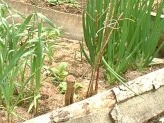
Each of the beds is divided into approximately one square foot units and marked out with sticks, twine, or sturdy slats to ensure that the square foot units remain visible as the garden matures.
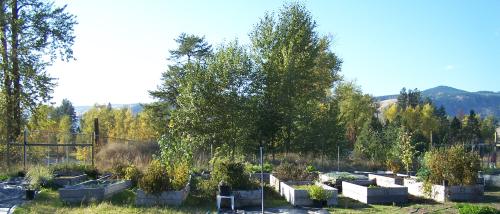
Different seeds are planted in each square, to ensure a rational amount of each type of crop is grown, and to conserve seeds instead of overplanting, crowding and thinning plants.
Common spacing is one plant per square for larger plants (broccoli, basil, etc.), four plants per square for medium large plants like lettuce, nine plants per square for medium-small plants like spinach, and sixteen per square for small plants such as onions and carrots.
Plants that normally take up yards of space as runners, such as squash or cucumbers, are grown vertically on sturdy frames that are hung with netting or string to support the developing crops.
Ones that grow deep underground, such as potatoes or carrots, are grown in a square foot section that has foot tall sides and a planting surface above the ground, so that a foot or more of framed soil depth is provided above the garden surface rather than below it.
The beds are weeded and watered from the pathways, so the garden soil is never stepped on or compacted.
Because a new soil mixture is used to create the garden, and a few handfuls of compost are added with each harvest to maintain soil fertility over time, the state of the site's underlying soil is irrelevant.
This gardening method has been employed successfully in every region, including in deserts, on high arid mountain plateaus, in cramped city slums, and in areas with polluted or high salinity soils.
It is equally useful for growing flowers, vegetables, herbs and some fruits in containers, raised beds, on tabletops or at ground level, in only 4 to 6 inches of soil.
A few seeds per square foot, the ability to make compost, to water by hand, and to set up the initial garden in a sunny position or where a container, table or platform garden may be moved on wheels to receive light is all that is needed to set up a square foot garden.
First the location
Pick an area that gets 6-8 hours of sunshine daily.
Stay clear of trees and shrubs where roots and shade may interfere.
Have it close to the house for convenience.
Existing soil is not really important, since you won't be using it.
Area should not puddle after a heavy rain.
1 - LAYOUT . Always think in squares: lay out 4 foot by 4 foot planting areas with wide walkways between them.
2 - BOXES . Build garden box frames no wider than 4 feet, and 6 to 8 inches deep. The length is not as important, but a recommended size for your first time is one frame 4 foot by 4 foot. You can, of course, go smaller. A 2 foot by 2 foot works great on patios and 3 foot by 3 foot box is ideal for kids.
Frames can be made from almost any material except treated wood, which has toxic chemicals that might leach into the soil. 1 by 6 or 2 by 6 lumber is ideal, and comes in 8-foot lengths. Most lumber yards will cut it in half at little or no cost. Exact dimensions are not critical. Deck screws work best to fasten the boards together. Rotate or alternate corners to end up with a square inside.
3 - AISLES . If you plan to have more than one garden box, separate them by 2 or 3 feet to form walkways.
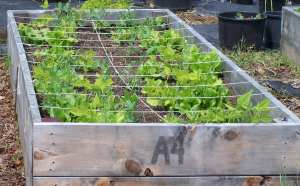
4 - SOIL . Fill frame with Mel's Mix, a mixture of 1/3 compost, 1/3 peat moss, and 1/3 coarse vermiculite (no dirt needed). A blended compost made from many ingredients provides all the nutrients the plants require (no chemical fertilizers needed). Peat moss and vermiculite help hold moisture and keep the soil loose.
It's best to make your own compost from many ingredients but if you have to buy it, make sure it is truly compost. Some stores sell mulch or humus and other ground covers but call it compost. Most commercial compost is made from one or two ingredients so to be safe, don't buy all of one kind but one of each kind until you have enough for your garden.
It's really best to make your own compost, then you know what goes in it. When buying vermiculite, be sure to get the coarse grade, and get the more economical 4 cubic foot size bags.
If placing frames over grass you can dig out the grass or cover it with cardboard or landscape cloth to discourage grass and weeds from coming up through your new garden soil.
5 - GRID . On top of each frame place a permanent grid that divides the box into one foot squares. The grid is the unique feature that makes the whole system work so well. To show you why the grid is so important, do this little demonstration: Look at your 4 foot by 4 foot box with the grid on and imagine up to 16 different crops. What you see before you is a neat and attractive, well organized garden, that will be easy to manage.
Now remove the grid. Could you organize and manage this space without dividing it up into squares? Besides, without the grid you will be tempted to plant in rows, which is a poor use of space.
Grids can be made from nearly any material; wood, plastic strips, old venetian blinds, etc. Use screws or rivets to attach them where they cross. On a 4 foot by 4 foot frame, the grid divides the frame into 16 easy-to-manage spaces, for up to 16 different crops. Leave the grid in place all season. The grid can be cut long enough to fit across the top of the box or cut shorter to lay on the soil inside the box.
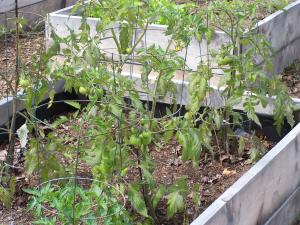
6 - CARE . Since you will NEVER walk on or depress the growing soil, don't make the frames any wider than 4 feet (2 feet, if only one side is accessible). Any wider makes it too difficult to reach in to tend the plants.
7 - SELECT . Depending on the mature size of the plant, grow 1, 4, 9, or 16 equally spaced plants per square foot. If the seed packet recommends plant spacing be 12 inches apart, plant one plant per square foot. If 6 inch spacing; 4 per square foot. If 4 inch spacing; 9 per square foot. If 3 inch spacing; 16 per square foot.
8 - PLANT . Plant one or two seeds in each spot by making a shallow hole with your finger. Cover, but do not pack the soil. Thinning is all but eliminated. Seeds are not wasted. Extra seeds can be stored cool and dry in your refrigerator.
Don't over-plant. Plant only as much of any one crop as you will use. This 4 foot by 4 foot box will grow more than a conventional garden that is 8 foot by 10 foot.
9 - WATER . Water only as much as each plant needs. Water often, especially at first, and on very hot dry days, If possible, water by hand ( uses a lot less water )with a cup from a sun-warmed bucket of water. Warm water helps the soil warm up in early and late season.
10 - HARVEST . Harvest continually and when a crop in one square is gone, add some new compost and plant a new different crop in that square.
To find out more about my secret method of insulated worm farming, sign up for the Composting E-Course (your free bonus when you subscribe to Out in the O-Garden Newsletter).
 Composting E-Course - sign up here
Get the free Composting E-Course delivered right to your inbox and learn tips and tricks to get your compost to work the first time.
Get started now; fill out the form;


